
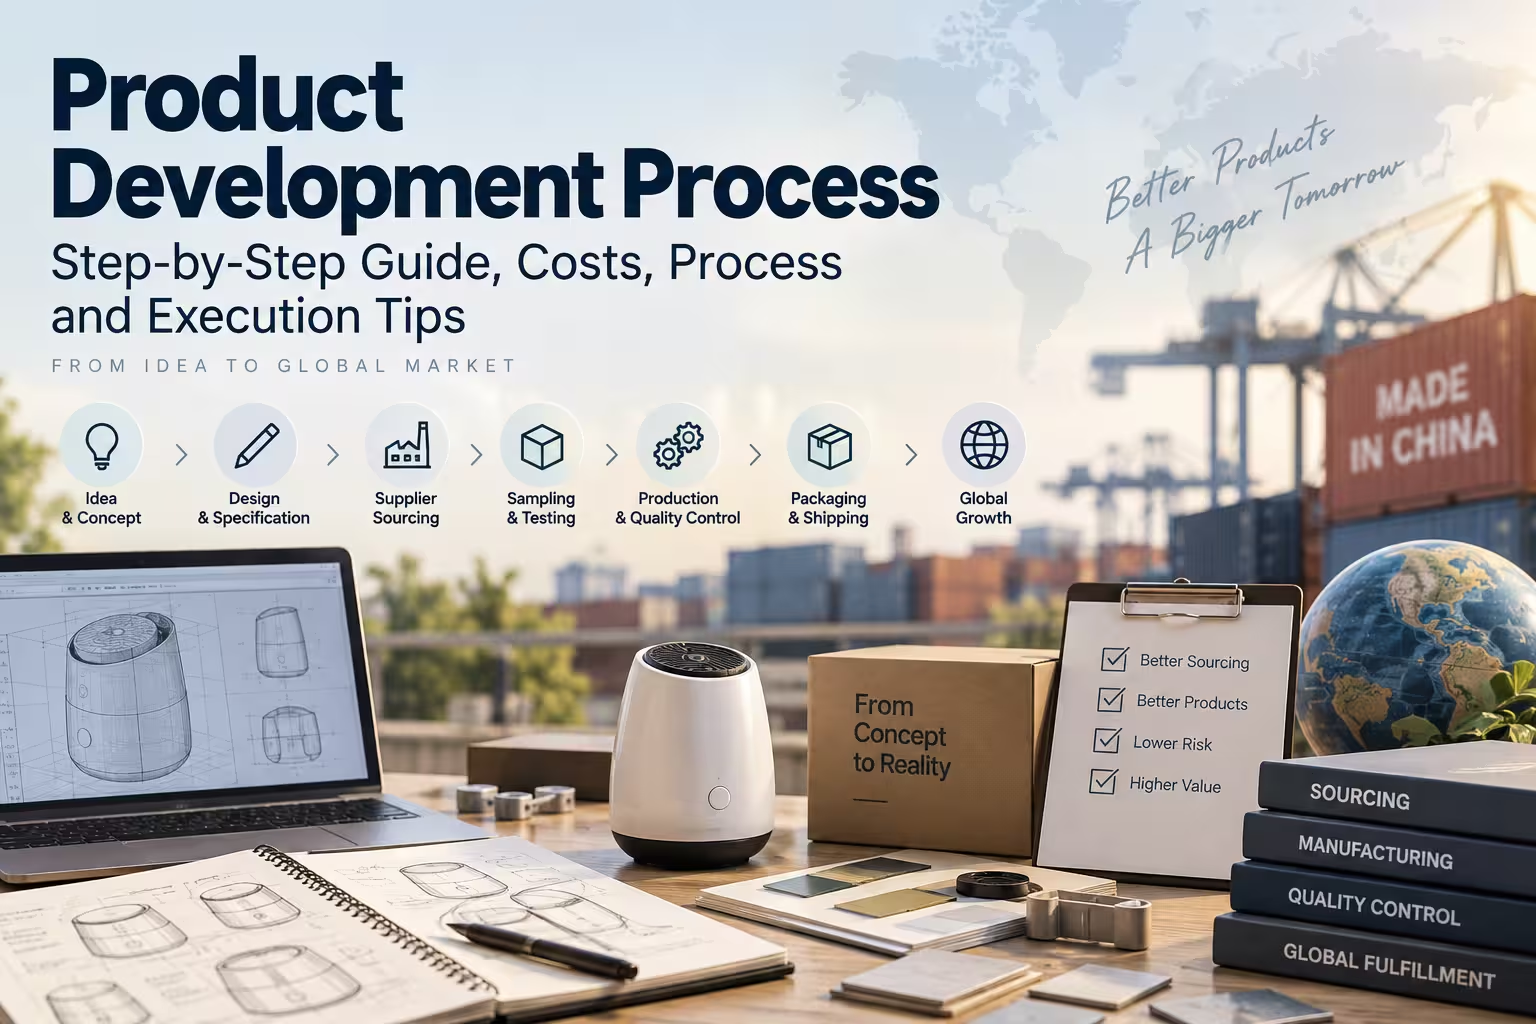
Turning a product idea into something that can be manufactured, shipped, and sold consistently involves much more than finding a factory.
A reliable product development process connects product definition, supplier sourcing, sampling, cost validation, quality control, packaging, production, and fulfillment into one coordinated workflow.
For brands sourcing or developing products in China, problems often begin when these stages are treated separately. A product may look good in a sample but become too expensive at scale. A supplier may meet the target price but fail packaging tests. A design may be manufacturable but create quality problems once production volume increases.
The most effective approach is therefore not simply to move from idea to production as quickly as possible. It is to validate the product at each stage before committing more money, inventory, and time.
This guide explains the complete product development process, typical costs and timelines, common risk points, and practical execution tips for brands working with manufacturers and sourcing partners.
What Is the Product Development Process?
The product development process is the structured sequence used to turn a product concept into a commercially manufacturable product.
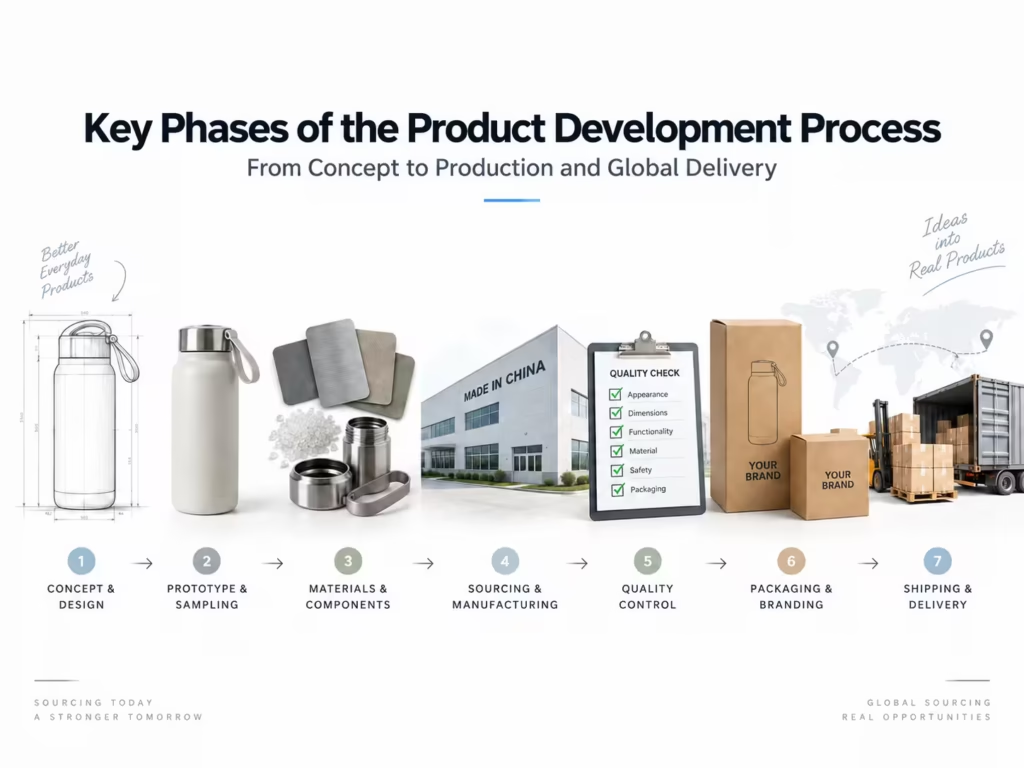
For physical products, the process normally includes:
- Product concept and requirements
- Product specification development
- Supplier and manufacturer sourcing
- Quotation and feasibility review
- Prototype or sample development
- Testing and design revisions
- Packaging development
- Pre-production approval
- Bulk manufacturing
- Quality inspection
- Shipping and fulfillment
- Post-launch improvement
These steps are sometimes described as product development stages, the product development lifecycle, the product development cycle, or a product development roadmap.
In practice, they describe the same overall objective: reducing uncertainty before a product reaches full-scale production.
For sourcing-based businesses, however, product development must also answer several commercial questions:
- Can the product actually be manufactured at the required specification?
- Can a supplier produce it consistently?
- What will the final landed cost be?
- What minimum order quantity is required?
- How long will tooling, sampling, and production take?
- How will product quality be verified before shipment?
- Can packaging survive transportation?
- Can the supplier scale if sales increase?
A strong process answers these questions before the buyer commits to a large purchase order.
Step 1: Define the Product Before Contacting Suppliers
The first stage is turning the initial idea into a clear product requirement.
Many sourcing problems begin because buyers approach factories with only a picture, a competitor link, or a general description.
That may be enough to receive an approximate quotation, but it is rarely enough to develop a reliable product.
A basic product brief should define:
- Product dimensions
- Materials
- Color and finish
- Functional requirements
- Performance expectations
- Target market
- Packaging format
- Branding requirements
- Expected order quantity
- Target cost range
- Relevant certifications or testing requirements
If an existing product is being customized, also identify exactly what must change.
For example, customization may involve:
- Logo printing
- Private-label packaging
- Different materials
- Modified dimensions
- New colors
- Accessories
- Electronic specifications
- Mold changes
- Structural changes
The clearer the specification is at the beginning, the easier it becomes to compare suppliers on the same basis.
Separate Must-Have Requirements From Preferences
Not every feature should have equal priority.
Divide requirements into three groups:
Mandatory requirements cannot be changed without affecting product function, compliance, or brand positioning.
Preferred requirements are important but may be adjusted if they significantly increase cost or production difficulty.
Optional features can be removed if they create unnecessary complexity.
This distinction becomes especially useful when suppliers begin recommending design changes.
Step 2: Check Manufacturing Feasibility
A design that looks good on paper is not automatically suitable for mass production.
Before investing in tooling or detailed samples, the manufacturer should review whether the design can be produced using available materials, processes, tolerances, and equipment.
Feasibility review may cover:
- Material availability
- Mold requirements
- Manufacturing tolerances
- Minimum wall thickness
- Assembly complexity
- Surface finishing
- Printing methods
- Component compatibility
- Production speed
- Expected defect risks
A factory may also recommend Design for Manufacturing changes that make the product easier or less expensive to produce.
For example, slightly modifying a component shape might eliminate an additional machining process. Changing a finish might reduce rejection rates. Using a more commonly available material may shorten procurement lead time.
The goal is not simply to simplify the product. It is to find the best balance between product performance, appearance, cost, and manufacturing reliability.
Step 3: Source and Compare Suitable Manufacturers
Once the basic product requirements are clear, supplier sourcing can begin.
The lowest quotation is rarely enough to identify the best supplier.
A supplier should be evaluated based on whether its capabilities match the specific product.
Important factors include:
- Experience with similar products
- Production equipment
- Available materials
- Customization capabilities
- Quality-control procedures
- Export experience
- Minimum order quantity
- Production capacity
- Communication quality
- Sample development ability
- Certifications and test documentation
- Lead time
- Payment terms
The sourcing stage may include manufacturers, component suppliers, packaging factories, and sometimes separate assembly partners.
For more complex products, a single finished item may depend on several suppliers.
This is why Product Sourcing Services can become particularly useful during development. The task is not only finding a supplier but coordinating multiple vendors while keeping specifications, costs, and deadlines aligned.
Compare Suppliers Using the Same Specification
Avoid sending different descriptions to different factories.
Create one specification sheet and request quotations against the same requirements.
Otherwise, one supplier may quote a cheaper material, another may exclude packaging, and another may assume a different order quantity. The prices then appear comparable when they are not.
Step 4: Build a Realistic Cost Model
Product development cost is more than the factory’s unit price.
Buyers should separate one-time development costs from recurring production costs.
Common One-Time Product Development Costs
These may include:
- Product design
- Engineering
- CAD drawings
- Prototype creation
- Mold or tooling fees
- Custom printing plates
- Packaging design
- Testing
- Certification
- Sample shipping
Tooling can become one of the largest upfront expenses for highly customized products.
Simple private-label products may require almost no tooling, while injection-molded or custom structural products can require significant initial investment.
Common Recurring Costs
Recurring costs usually include:
- Product unit cost
- Components
- Packaging
- Labels
- Inserts
- Assembly
- Quality inspection
- Freight
- Customs duties
- Warehousing
- Fulfillment
The final number that matters commercially is usually the landed cost, not only the ex-factory product price.
A product that costs $5 at the factory might cost substantially more after packaging, inspection, shipping, import charges, and fulfillment are included.
Why Cost Should Be Reviewed Early
One of the most expensive development mistakes is perfecting a product before confirming whether the final selling economics work.
Estimate the target landed cost before extensive development begins.
If the expected cost is already too high, the design can still be changed before expensive tooling or production commitments are made.
Step 5: Develop the First Prototype or Sample
Sampling converts the specification into a physical product that can be evaluated.
Depending on the product, the first sample may be:
- An existing factory sample
- A modified stock product
- A handmade prototype
- A CNC prototype
- A 3D-printed prototype
- A pre-production sample
- A sample made from production tooling
The purpose of the first sample is usually not to achieve perfection.
It is to identify differences between the design assumptions and the physical product.
Check areas such as:
- Dimensions
- Materials
- Weight
- Color
- Surface finish
- Function
- Assembly
- Branding
- Printing
- Accessories
- Packaging compatibility
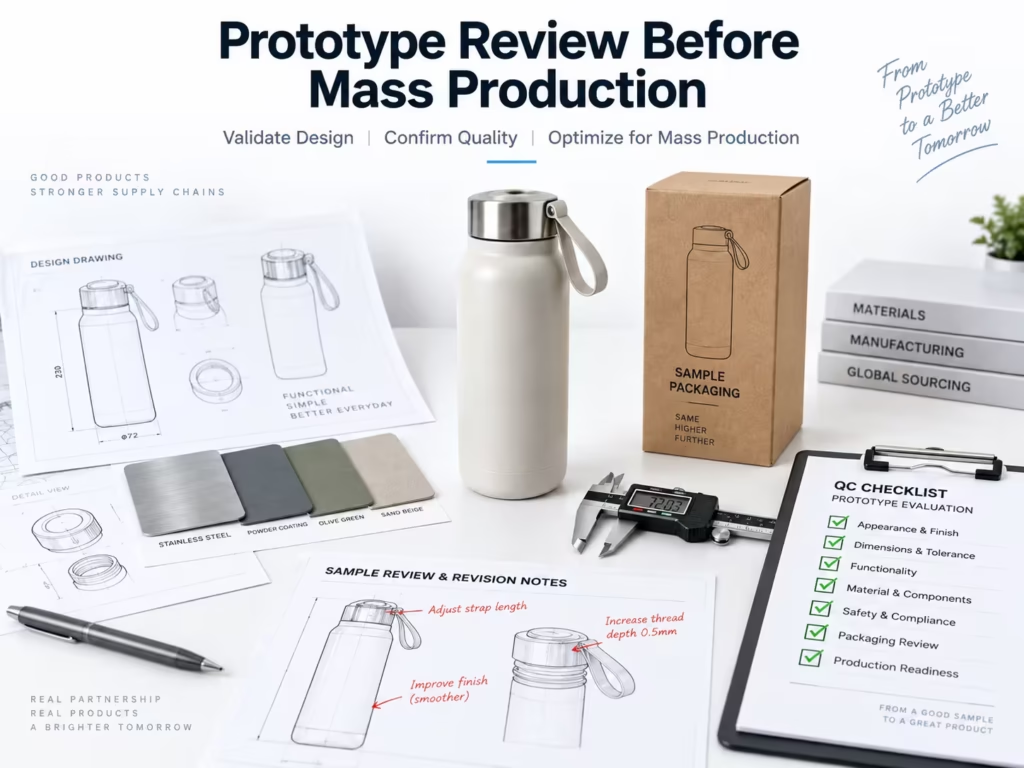
All issues should be documented rather than communicated only through chat messages.
Photos, marked-up drawings, measurements, and numbered revision lists make changes easier for factories to understand.
Step 6: Test, Revise, and Approve the Product
Most custom products require more than one sample round.
The first sample often reveals issues that were difficult to predict during design.
These may include:
- Loose tolerances
- Incorrect colors
- Weak components
- Poor fit
- Surface defects
- Printing problems
- Packaging damage
- Unexpected user-experience issues
The product should then move through a controlled revision cycle.
A useful approach is:
Sample → Test → Record Issues → Revise Specification → Produce New Sample → Retest
Each approved change should be added to the formal product specification.
Do not rely on the supplier to remember changes discussed across emails or messaging apps.
Create a Golden Sample
Once the product is approved, keep a final reference sample.
This is often called the golden sample.
The golden sample provides a physical benchmark for:
- Color
- Materials
- Dimensions
- Surface finish
- Branding
- Accessories
- Assembly quality
It becomes especially useful when inspecting bulk production.
Step 7: Finalize Packaging Before Mass Production
Packaging should not be left until the final week before shipping.
Packaging can affect:
- Product protection
- Freight cost
- Dimensional weight
- Customer experience
- Retail presentation
- Label compliance
- Warehouse handling
- Damage rates
Packaging development may include:
- Individual product boxes
- Polybags
- Inserts
- Instruction manuals
- Barcode labels
- Shipping cartons
- Protective foam
- Retail packaging
- Master cartons
For e-commerce products, packaging should also be reviewed against expected shipping conditions.
A visually attractive box that performs poorly during transportation can create returns and customer complaints even when the product itself is good.
Step 8: Run a Pre-Production Review
Before bulk production begins, confirm all final production requirements.
A pre-production checklist should include:
- Approved product specification
- Final drawings
- Golden sample
- Materials
- Components
- Colors
- Logo position
- Printing files
- Packaging
- Labels
- Barcode information
- Carton markings
- Inspection standard
- Order quantity
- Production schedule
- Shipping requirements
Any remaining ambiguity should be resolved before production starts.
Changes made after production has already begun can lead to rework, material waste, delays, and additional charges.
Step 9: Start Bulk Production
Once the final sample and specifications are approved, the supplier can begin mass production.
Production lead time depends heavily on the product.
Some manufacturers can produce straightforward private-label orders within a few weeks, while custom products involving molds, special materials, electronics, or multiple components can take considerably longer.
During production, buyers should monitor key milestones rather than waiting until the expected completion date.
Typical milestones include:
- Raw material procurement
- Component production
- Printing
- Assembly
- Packaging
- Final inspection
- Shipment readiness
For larger or technically complex orders, an during-production inspection can help detect problems before the full order is completed.
Correcting a defect when 10% of an order has been produced is much easier than discovering it after 100% is packed.
Step 10: Inspect the Product Before Shipment
Quality inspection should verify that mass-produced goods match the approved specification.
Inspection may include:
- Quantity verification
- Workmanship checks
- Dimensions
- Functional testing
- Color comparison
- Material verification
- Logo and printing
- Accessories
- Packaging
- Labels
- Carton condition
- Barcode scanning
For many consumer products, inspectors use statistical sampling rather than checking every individual item.
The inspection criteria should be agreed upon before production.
Defects can normally be categorized as:
- Critical defects
- Major defects
- Minor defects
Defect limits should reflect the actual risk of the product.
A cosmetic mark on packaging is very different from an electrical safety failure.
Do Not Treat Inspection as a Substitute for Supplier Management
Final inspection is important, but it should not be the only quality-control measure.
The strongest product development process prevents problems earlier through clear specifications, approved samples, supplier evaluation, and production monitoring.
Inspection should confirm quality, not attempt to redesign the product after production is finished.
Step 11: Arrange Shipping and Fulfillment
Once the order passes inspection, products can move into logistics and fulfillment.
Depending on the destination and order size, transportation may involve:
- Express courier
- Air freight
- Sea freight
- Rail freight
- Truck transportation
- Combined shipping methods
The best shipping option depends on:
- Product weight
- Shipment volume
- Product value
- Required delivery speed
- Inventory urgency
- Destination
- Freight rates
For new product launches, some brands split shipments.
A smaller quantity can use air freight while the remaining inventory travels by sea to start selling quickly without paying air-freight rates for the entire order.
This can reduce launch delays without paying air-freight rates for the entire order.
Step 12: Use the First Production Run to Improve the Next One
Product development does not necessarily end when the first shipment leaves the factory.
The first commercial production run provides useful information that prototypes cannot always reveal.
Monitor:
- Customer complaints
- Return reasons
- Product failures
- Packaging damage
- Assembly issues
- Supplier defects
- Fulfillment problems
- Cost changes
These findings can be incorporated into the next production cycle.
For example, a small packaging change may reduce shipping damage. A stronger component may reduce warranty claims. A supplier may improve a production fixture to increase consistency.
This continuous improvement is why product development is sometimes described as a lifecycle rather than a single linear process.
How Long Does the Product Development Process Take?
There is no universal product development timeline.
A simple private-label product can move much faster than a completely custom item requiring engineering and new tooling.
A typical process may look like this:
| Development Stage | Typical Focus |
|---|---|
| Product definition | Requirements, specifications, target cost |
| Supplier sourcing | Factory screening and quotations |
| Sampling | Prototype creation and initial evaluation |
| Revision | Testing and sample improvements |
| Packaging | Artwork, labels, protection and carton design |
| Pre-production | Final specifications and approvals |
| Production | Manufacturing and assembly |
| Inspection | Quality verification before shipment |
| Logistics | Freight, customs and fulfillment |
Actual timing can range from several weeks for simple products to several months for highly customized projects.
The biggest causes of delay are often not manufacturing itself.
They include:
- Unclear specifications
- Slow sample feedback
- Multiple design changes
- Custom tooling
- Component shortages
- Packaging revisions
- Testing failures
- Supplier communication problems
The best way to shorten development time is usually not to skip stages but to make decisions faster and provide suppliers with clearer information.
How Much Does Product Development Cost?
Product development cost varies significantly depending on customization level.
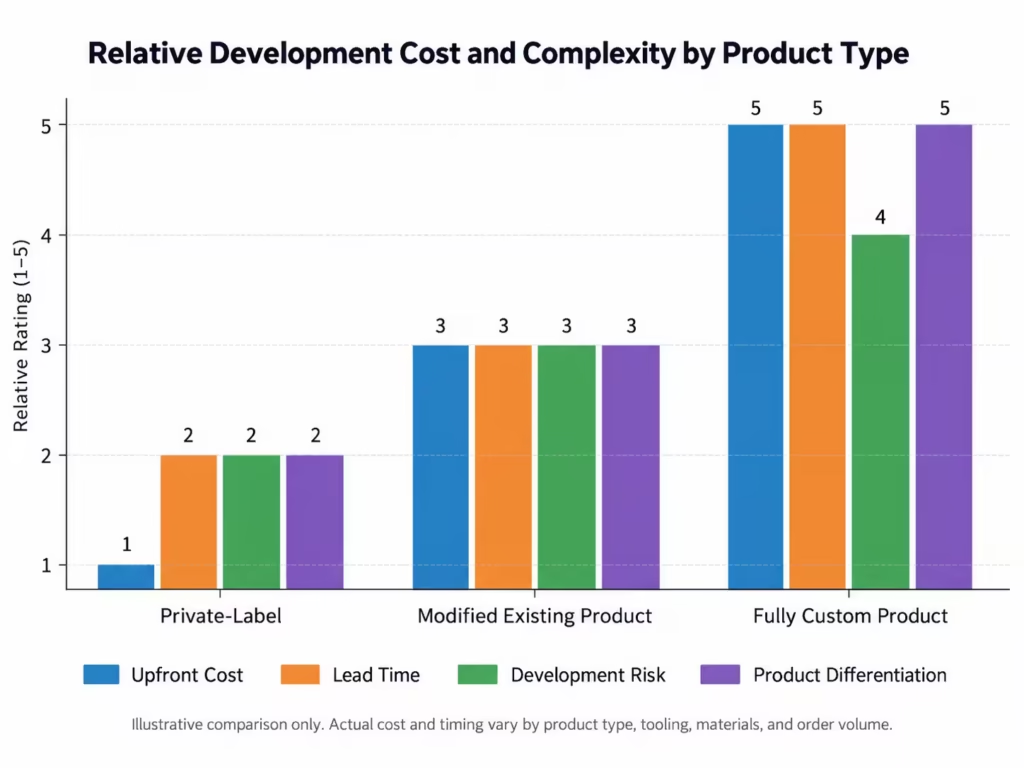
A useful way to think about cost is to divide projects into three broad categories.
Private-Label Products
These use an existing product with limited customization, such as:
- Logo printing
- Custom packaging
- Color changes
- Branded inserts
Development costs are usually relatively low because the manufacturer already has the product, tooling, and production process.
Modified Existing Products
These involve changes to an existing factory design.
Examples include:
- Different dimensions
- New materials
- Modified components
- Structural adjustments
- Additional features
Costs can increase because new samples, engineering work, and partial tooling may be required.
Fully Custom Products
These start from a new design and may require:
- Industrial design
- Engineering
- Custom molds
- Electronics development
- Specialized components
- Testing
- Certification
Upfront development costs can be much higher, but the result may also provide greater differentiation from existing products.
Instead of asking only, “How much does product development cost?” buyers should ask:
How much capital must be committed before the product has been sufficiently validated?
Keeping early commitments small gives the buyer more opportunities to correct problems before moving into expensive stages.
Where Product Development Projects Usually Go Wrong
Most failed sourcing projects do not fail because one dramatic mistake occurs.
They fail because several small assumptions accumulate.
Choosing a Supplier Mainly on Price
A low price may reflect different materials, weaker quality control, excluded packaging, lower specifications, or unrealistic assumptions.
Compare the entire offer rather than the quoted unit price alone.
Starting Samples Without a Clear Specification
When requirements are vague, each sample round becomes an experiment.
Document the target before requesting samples.
Making Too Many Changes at Once
When five variables are changed simultaneously, it becomes difficult to identify which change caused a new problem.
Control revisions and document each version.
Approving a Sample Without Confirming Production Materials
A supplier may occasionally use sample materials that are easier to obtain than the material intended for mass production.
Confirm that the approved sample reflects the final production specification.
Waiting Until Production Ends to Check Quality
Production-stage problems become much more expensive once the entire order has been manufactured.
Monitor critical stages when the order is complex or high value.
Ignoring Packaging Until the End
Packaging affects freight, damage, branding, and customer experience.
Develop it in parallel with the product.
Product Development Execution Checklist
Before moving from development into production, confirm that you have:
- A written product specification
- Final dimensions and materials
- Approved colors and finishes
- Confirmed functional requirements
- Selected the appropriate manufacturer
- Compared quotations using identical requirements
- Calculated the expected landed cost
- Approved the final sample
- Recorded all sample revisions
- Created or retained a golden sample
- Finalized packaging
- Confirmed labels and barcodes
- Confirmed certification requirements
- Defined inspection criteria
- Confirmed production lead time
- Confirmed MOQ
- Confirmed payment terms
- Confirmed shipping requirements
- Planned pre-shipment quality inspection
- Documented all final production requirements
If several of these items are still uncertain, the product is probably not ready for mass production.
| Stage | What to Confirm | Main Deliverable | Common Risk |
|---|---|---|---|
| Product Definition | Requirements, target cost, target market | Product brief / specification sheet | Unclear requirements |
| Supplier Sourcing | Capability, MOQ, lead time, communication | Supplier shortlist / quotations | Choosing by price only |
| Sampling | Dimensions, materials, appearance, function | Prototype / revised sample | Incomplete feedback |
| Cost Review | Unit cost, tooling, packaging, landed cost | Cost model | Margin miscalculation |
| Pre-Production | Packaging, labels, barcode, final sample | Approved golden sample | Last-minute changes |
| Quality Control | Inspection standard, sampling criteria | QC checklist / inspection plan | No measurable standard |
| Shipping & Fulfillment | Shipping method, timeline, packing details | Shipping plan | Delay or packaging damage |
How to Make the Product Development Process More Efficient
Speed comes from reducing uncertainty, not simply pushing the supplier harder.
Several practices can make development more predictable.
Use One Source of Truth for Specifications
Maintain a master specification file instead of spreading requirements across emails and messages.
Set Approval Gates
Do not automatically move to the next stage.
Require approval after major milestones such as:
- Design confirmation
- First sample
- Final sample
- Packaging
- Pre-production
- Inspection
Validate Cost Throughout the Process
A design change that adds only a small amount to unit cost can become significant across thousands of units.
Update the cost model when specifications change.
Keep Supplier Alternatives Available
Relying on one factory too early reduces flexibility.
Where practical, compare several suppliers before committing tooling or large deposits.
Treat Quality Control as Part of Development
Inspection requirements should be created while the product is being developed, not after it is already manufactured.
A specification that cannot be measured or inspected is difficult to enforce.
Product Development Process vs Product Sourcing
Product development and product sourcing are closely connected, but they are not identical.
Product sourcing focuses primarily on identifying, evaluating, and purchasing from suitable suppliers.
Product development starts earlier and usually includes defining, modifying, testing, and validating the product before mass production.
A business purchasing an existing catalog product may mainly need sourcing.
A business creating a customized product normally requires both.
In China sourcing projects, these activities often overlap because design decisions, supplier capability, MOQ, tooling, material availability, and cost constantly influence one another.
That is why coordinating Custom/Product Development with supplier sourcing can reduce communication gaps between the design and manufacturing stages.
Final Thoughts
A successful product development process is not simply a sequence of samples followed by a purchase order.
It is a controlled decision-making process that reduces risk as investment increases.
Start by clearly defining the product. Confirm manufacturing feasibility and cost before committing heavily. Compare qualified suppliers using the same specification. Test samples systematically, document revisions, finalize packaging, and establish measurable quality requirements before production.
Then monitor manufacturing and inspect the finished order before shipment.
For brands developing products through Chinese suppliers, the most reliable workflow is:
Concept → Specification → Supplier Sourcing → Feasibility Review → Sampling → Testing → Revision → Packaging → Pre-Production Approval → Bulk Production → Quality Inspection → Shipping → Continuous Improvement
Following this structure helps prevent expensive redesigns, inconsistent production, unexpected costs, and avoidable launch delays while giving buyers a repeatable roadmap for future products.
FAQ
What Is a Golden Sample and Why Is It Important for Mass Production?
A golden sample is the final approved physical sample used as a reference for bulk production and inspection. It helps buyers and suppliers compare color, materials, dimensions, finish, branding, accessories, and assembly quality against an agreed standard.
When Should You Pay for Molds and Tooling During Product Development?
Tooling should normally be committed only after the product concept, manufacturability, expected cost, and key specifications have been sufficiently validated. Paying too early increases the risk of expensive redesigns if the product changes later.
How Do You Prevent a Supplier From Changing Materials During Mass Production?
Use a written specification, approved material requirements, a golden sample, measurable inspection criteria, and production monitoring. Buyers should not rely only on verbal agreements or chat messages when approving material or design changes.
Can You Change Product Specifications After the Final Sample Is Approved?
Yes, but late changes can create rework, wasted materials, production delays, and extra charges. Important changes should ideally be finalized before bulk production begins and then added to the master product specification.
How Do You Know When a Product Is Ready for Mass Production?
A product is ready when the specification, final sample, materials, packaging, labels, inspection criteria, production timeline, MOQ, payment terms, and shipping requirements have all been confirmed. If several of these points are still uncertain, production should usually wait.
Sources
[1] Identified Research Directions for Using Manufacturing Knowledge Earlier in the Product Life Cycle — nist.gov
[2] Determine Total Export Price — trade.gov
[3] Sampling in Quality Control: What Is Quality Sampling? — asq.org